Understanding Blend Door Actuators
Manually adjusting a blend door actuator involves rotating it with the door‚ aligning mounting screws‚ and potentially requiring recalibration for optimal temperature control.
Sometimes‚ manual adjustment is needed if the actuator loses its initial position during replacement‚ ensuring proper alignment and functionality within the HVAC system.
Carefully disconnecting the electrical connector is crucial before attempting any manual manipulation‚ preventing damage and ensuring a safe adjustment process.
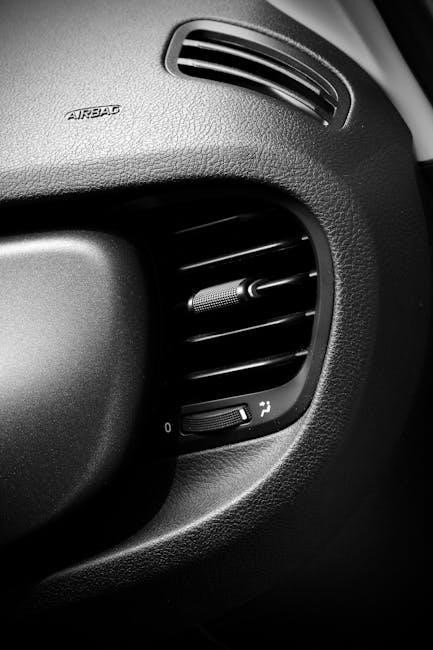
What is a Blend Door Actuator?
The blend door actuator is a small electric motor responsible for controlling the blend door within your vehicle’s HVAC (Heating‚ Ventilation‚ and Air Conditioning) system. This door directs airflow over the heater core or around it‚ dictating whether hot or cold air enters the cabin. Essentially‚ it’s the component that allows you to select your desired temperature.
When replacing an actuator‚ it’s often necessary to understand its initial position. As noted in online forums‚ simply attaching the new actuator to the door and rotating both together aligns the mounting screws‚ a technique to avoid calibration issues. However‚ attempting to operate a disconnected actuator can cause it to lose its “index position‚” making future adjustments difficult. Therefore‚ careful handling and understanding of its function are paramount.
A malfunctioning actuator can lead to inconsistent temperatures‚ with air blowing only hot or only cold‚ regardless of your settings.
Function and Location
The primary function of the blend door actuator is precise temperature regulation within the vehicle. It receives signals from the climate control system and adjusts the blend door to mix heated and cooled air‚ delivering the desired cabin temperature. Its location varies significantly by vehicle make and model‚ but it’s typically found behind the dashboard‚ often near the heater core and evaporator.
Accessing the actuator for manual adjustment often requires removing dashboard components. Online resources emphasize the importance of understanding the actuator’s position relative to the blend door before disconnecting it. Rotating the actuator and door together‚ as suggested by experienced mechanics‚ ensures proper alignment during reinstallation. Remember‚ attempting operation while disconnected can lead to a loss of its internal index‚ complicating the process.
Obstructions within the ductwork can also mimic actuator failure‚ so a thorough inspection is crucial.
Common Symptoms of a Failing Actuator
If manual adjustment becomes necessary‚ it often indicates underlying issues with the actuator itself. Common symptoms include inconsistent temperature control – experiencing only hot or cold air‚ regardless of settings. You might also notice clicking or popping noises emanating from behind the dashboard as the actuator struggles to move the blend door.
A failing actuator can lead to a complete loss of temperature control‚ or the system may get stuck in a single mode. If‚ after replacement‚ the actuator is in the wrong position‚ manual intervention is often required. However‚ remember that forcing adjustment without addressing the root cause is a temporary fix.
Furthermore‚ obstructions within the ductwork‚ like debris jamming the blend door‚ can present similar symptoms‚ necessitating a thorough inspection before actuator manipulation.

Diagnosing Blend Door Actuator Issues
Initial diagnosis involves a visual inspection‚ listening for unusual noises‚ and utilizing a scan tool to check for diagnostic trouble codes related to the actuator.
Before manual adjustment‚ confirm the actuator isn’t losing its index position or encountering obstructions within the blend door’s pathway.
Initial Visual Inspection
Begin with a thorough visual inspection of the blend door actuator and its surrounding components. Look closely for any obvious signs of physical damage‚ such as cracks in the actuator housing‚ broken gears‚ or disconnected linkages. Examine the actuator’s mounting points to ensure they are secure and haven’t been compromised.
Inspect the blend door itself for any obstructions that might be preventing its movement. According to online forums‚ debris can sometimes fall into the ductwork‚ jamming the door. Check for any visible signs of wear or corrosion on the actuator’s electrical connector and wiring harness. A damaged connector can lead to intermittent or complete failure.
This preliminary assessment can often reveal the root cause of the problem or at least narrow down the potential issues before proceeding with more complex diagnostic steps‚ like manual adjustment.
Listening for Actuator Noise
Carefully listen for any unusual noises emanating from the blend door actuator while adjusting temperature settings. A clicking sound often indicates the actuator is attempting to move the blend door but is encountering resistance. Grinding or stripping noises suggest internal gear damage within the actuator itself‚ potentially requiring replacement rather than adjustment.
Pay attention to whether the noise occurs consistently or only during specific temperature changes. Silence doesn’t necessarily mean the actuator is functioning correctly; it could indicate a complete failure or a loss of power.
If you suspect the actuator is the source of the noise‚ try to pinpoint its location precisely. This can help confirm the diagnosis and guide your manual adjustment efforts. Remember‚ a noisy actuator is a strong indicator of an underlying problem.
Using a Scan Tool for Diagnostic Codes
Employing a scan tool is vital for retrieving diagnostic trouble codes (DTCs) related to the blend door actuator. These codes can pinpoint specific issues‚ such as actuator position errors or communication failures. A code indicating an incorrect actuator position can confirm the need for manual adjustment.
Before manually adjusting‚ clear any existing codes and re-scan after the adjustment to verify if the issue has been resolved. Some vehicles require a calibration procedure after actuator replacement‚ which the scan tool can initiate.
Be aware that a lack of codes doesn’t always rule out an actuator problem; intermittent issues may not trigger a code immediately. Always correlate scan tool data with physical inspection and listening for unusual noises.

Manually Turning the Blend Door Actuator
Manual adjustment involves rotating the actuator and blend door simultaneously to align mounting points‚ ensuring proper HVAC function and avoiding index loss.
Reasons for Manual Adjustment
Manual adjustment of the blend door actuator becomes necessary in several scenarios‚ primarily following a replacement. Often‚ a new actuator’s internal position doesn’t perfectly match the blend door’s required angle for proper temperature control. This misalignment prevents secure mounting and correct operation.
Furthermore‚ if the actuator is removed without disconnecting power‚ or during the replacement process‚ it can lose its “index position” – its internal understanding of where the door should be. Attempting to force operation in this state can cause further complications.
Obstructions within the blend door path‚ like debris falling through vents‚ can also necessitate manual intervention to reposition the door. Ultimately‚ manual adjustment aims to synchronize the actuator and door‚ ensuring accurate temperature mixing and comfortable cabin climate.
Tools Required for Manual Adjustment
Successfully performing a manual blend door actuator adjustment requires a minimal‚ yet specific‚ toolkit. A socket wrench set is essential for removing and reinstalling the actuator mounting screws‚ ensuring a secure fit. A screwdriver set‚ encompassing various head types‚ will be needed for accessing the actuator and potentially removing surrounding panels.
While not always mandatory‚ a small inspection mirror and a flashlight can prove invaluable for visualizing the actuator and blend door in confined spaces. An oscillation tool might be necessary if obstructions are discovered within the ductwork‚ requiring careful removal.
Finally‚ a scan tool capable of performing actuator reset or calibration procedures is highly recommended post-adjustment‚ guaranteeing optimal system performance.
Accessing the Blend Door Actuator
Gaining access to the blend door actuator often requires removing interior panels‚ typically located beneath the dashboard on either the driver or passenger side. Begin by carefully removing any trim pieces obstructing the actuator’s location‚ utilizing appropriate tools to avoid damage.
Depending on the vehicle model‚ you may need to disconnect electrical connectors for nearby components to create sufficient working space. Locating the actuator itself can be challenging; a flashlight and inspection mirror are helpful for navigating confined areas.
Be prepared for limited accessibility‚ requiring patience and potentially contorted positions. Remember to document the removal process to facilitate reassembly.

Step-by-Step Guide to Manual Adjustment
Begin by disconnecting the actuator’s electrical connector‚ then rotate both the actuator and blend door simultaneously to align the mounting screw holes correctly.
Carefully align the mounting screws‚ ensuring a secure fit‚ and avoid forcing anything‚ as this could damage the actuator or the delicate blend door.
Finally‚ re-secure the actuator‚ and prepare for a potential reset or calibration procedure to ensure optimal HVAC system performance.
Disconnecting the Electrical Connector
Before attempting any manual adjustment of the blend door actuator‚ completely disconnecting the electrical connector is paramount. This prevents accidental activation of the actuator during the process‚ which could lead to damage or loss of the actuator’s index position.
Locate the connector‚ often found directly attached to the actuator itself. Gently‚ but firmly‚ press the release tab – typically a small clip – while simultaneously pulling the connector straight back. Avoid twisting or yanking‚ as this could damage the connector or the wiring harness.
Once disconnected‚ ensure the connector is safely secured away from the work area to prevent accidental reconnection. Do not attempt to operate the actuator while it’s disconnected or removed from the core box‚ as this can indeed cause it to lose its index position‚ making future correction difficult.
Rotating the Actuator and Door Together
With the electrical connector safely disconnected‚ you can now begin rotating the actuator and the blend door as a single unit. This is a crucial step to ensure proper alignment and avoid straining the actuator or door mechanism. Grip the actuator firmly‚ and gently apply rotational force in the direction needed to align the mounting screw holes.
The goal is to move the door to the desired position – typically fully open or closed – while keeping the actuator engaged. This method minimizes the risk of losing the actuator’s internal index position.
Avoid excessive force; if resistance is encountered‚ investigate for obstructions within the ductwork. Remember‚ rotating them together ensures the actuator’s internal calibration remains synchronized with the door’s physical location.
Aligning the Mounting Screws
Once the actuator and blend door are rotated to the correct position‚ the next step is aligning the mounting screw holes. Carefully observe the screw holes on both the actuator and the housing. You may need to make slight adjustments to the rotation‚ back and forth‚ to achieve perfect alignment.
This alignment is critical for securely fastening the actuator and preventing it from shifting during vehicle operation. Ensure the screws can be inserted smoothly without any forced threading‚ which could damage the plastic components.
If alignment proves difficult‚ double-check for any obstructions or binding within the blend door mechanism. Patience is key during this stage to avoid stripping the screw holes.
Securing the Actuator
With the mounting screw holes aligned‚ carefully insert and tighten the screws to secure the blend door actuator. Avoid over-tightening‚ as this can easily strip the plastic screw holes or crack the actuator housing. A snug fit is sufficient to hold the actuator firmly in place.
Double-check that the actuator is flush against the housing and doesn’t exhibit any wobble. Once secured‚ gently attempt to move the blend door manually to confirm it rotates smoothly without resistance.
Reconnecting the electrical connector is the final physical step. Ensure it clicks securely into place‚ establishing a solid connection for proper actuator operation. A loose connection can lead to intermittent or complete failure.

Actuator Reset and Calibration
Resetting is often vital after manual adjustment‚ as the system needs to relearn the actuator’s full range of motion for accurate temperature control.
Vehicle-specific procedures may involve using a scan tool or performing a specific sequence of HVAC control operations to calibrate the new position.
Proper calibration ensures the blend door actuator functions correctly‚ delivering consistent and comfortable climate control within the vehicle.
Why Resetting is Necessary
Resetting the blend door actuator after manual adjustment is a critical step often overlooked‚ yet profoundly important for restoring full functionality. When an actuator is manually repositioned‚ or replaced‚ it doesn’t inherently “know” its limits within the HVAC system. The control module requires a recalibration process to define the actuator’s zero and full travel positions.
Without this reset‚ the system may interpret the actuator’s current position as incorrect‚ leading to inaccurate temperature control‚ or even continued malfunction. The actuator might be stuck in a partially open or closed state‚ resulting in only heat‚ only cold air‚ or a limited temperature range.
Furthermore‚ some vehicles utilize sophisticated self-learning algorithms. These algorithms rely on the reset procedure to establish a baseline‚ allowing the system to adapt and maintain optimal performance over time. Failing to reset can prevent these algorithms from functioning correctly‚ compromising the overall efficiency and comfort of the climate control system.
Reset Procedures – General Overview
Generally‚ blend door actuator reset procedures involve a sequence of ignition cycles combined with specific HVAC control inputs. Typically‚ this begins with turning the ignition to the “on” position‚ without starting the engine. Then‚ manipulate the temperature control from full hot to full cold‚ and repeat this cycle several times – often three to five repetitions.
This process signals the HVAC control module to initiate a learning routine‚ allowing it to determine the actuator’s range of motion. Some systems may also require cycling the fan speed from low to high during this procedure. It’s crucial to follow the sequence precisely‚ as deviations can hinder the reset process.
After completing the cycles‚ the module should store the new actuator positions. However‚ vehicle-specific procedures are paramount‚ as the exact steps can vary significantly. A scan tool capable of actuator testing and reset functions can often streamline and confirm the process.
Vehicle-Specific Reset Procedures
Resetting a blend door actuator is rarely universal; procedures differ significantly between manufacturers and even models within a brand. For General Motors vehicles‚ a common method involves disconnecting the battery for 15 minutes‚ then performing the temperature swing procedure – hot to cold‚ multiple cycles – while the ignition is on.
Ford and Dodge vehicles often require utilizing a scan tool to access the HVAC module and initiate a “blend door actuator relearn” function. This allows for precise calibration and eliminates guesswork. Some newer vehicles may automatically perform a relearn after a battery disconnect or actuator replacement.
Consulting a vehicle’s service manual or accessing online databases with vehicle-specific TSBs (Technical Service Bulletins) is crucial for accurate instructions. Ignoring these specifics can lead to continued HVAC malfunctions and inaccurate temperature control.

Potential Problems During Manual Adjustment
Actuators can lose their index position when removed‚ and obstructions within the ductwork‚ or damage to the door itself‚ can hinder smooth operation.
Attempting to operate a disconnected actuator risks losing calibration‚ while forcing a jammed door can cause actuator or component damage.
Actuator Losing Index Position
A significant concern during manual blend door actuator adjustment is the potential for the actuator to lose its “index position.” This refers to the actuator’s internal understanding of its rotational point relative to the blend door. When disconnected and manipulated without power‚ the actuator essentially forgets where it is in its cycle.
This loss of position can make proper recalibration difficult‚ as the vehicle’s computer may struggle to accurately command the actuator to specific positions. It’s crucial to avoid operating the actuator while it’s detached from the core box to prevent this issue.
The recommendation from experienced mechanics is to attach the actuator to the blend door and rotate them together to align the mounting screws. This method minimizes the risk of losing the index position‚ simplifying the subsequent recalibration process and ensuring accurate temperature control.
Obstructions in the Blend Door Path
A common‚ yet often overlooked‚ reason for blend door actuator issues isn’t the actuator itself‚ but rather obstructions within the blend door’s pathway. Debris‚ such as leaves‚ foam‚ or even small objects‚ can fall into the ductwork and physically block the door’s movement‚ creating the illusion of a faulty actuator.
Experienced technicians have discovered foreign objects lodged behind the blend door‚ jamming its operation. This necessitates a more thorough investigation beyond simply replacing or adjusting the actuator.
Before attempting manual adjustment or recalibration‚ it’s vital to consider the possibility of an obstruction. Cutting an access hole (with caution!) to visually inspect the blend door area can reveal the root cause‚ saving time and preventing further complications. Addressing the obstruction is key to a lasting repair.
Damage to the Actuator or Door
Attempting manual adjustment on a damaged blend door actuator or the blend door itself can exacerbate the problem‚ potentially leading to complete failure. Forcing movement on a compromised component risks stripping gears or causing further fractures;
Careful visual inspection is paramount before any manipulation. Look for cracked housings‚ broken mounting points‚ or stripped gear teeth on the actuator. Similarly‚ examine the blend door for cracks or warping that could impede smooth operation.
Operating the actuator while detached from the core box can cause it to lose its indexed position‚ making proper recalibration extremely difficult‚ if not impossible. If damage is evident‚ replacement of the affected part(s) is the recommended course of action‚ rather than attempting a repair.

Preventative Maintenance
Regularly inspect the actuator and surrounding ductwork for obstructions or damage‚ addressing issues promptly to prevent blend door malfunctions and maintain optimal HVAC performance.
Regular Inspection of Actuator and Components
Consistent visual checks of the blend door actuator and its related components are paramount for preventative maintenance. Look for any visible signs of wear‚ cracks‚ or damage to the actuator housing itself. Examine the gear drive‚ ensuring smooth operation and no obstructions are present‚ as debris can jam the blend door.
Furthermore‚ inspect the ductwork surrounding the actuator for any potential blockages‚ as noted in forum discussions regarding Dodge Ram issues. A thorough inspection can reveal early warning signs‚ potentially avoiding the need for manual adjustment or complete actuator replacement. Remember‚ a proactive approach minimizes the risk of temperature control problems and ensures consistent HVAC performance.
Don’t forget to check for loose connections or damaged wiring associated with the actuator‚ as these can also contribute to malfunctions.
Addressing Underlying Issues
Beyond the actuator itself‚ identifying and resolving the root cause of blend door problems is crucial. As highlighted in Chevy Silverado/GMC Sierra forums‚ obstructions within the ductwork – like debris falling from vents – can jam the blend door‚ mimicking actuator failure. Thoroughly investigate the duct system for foreign objects.
If manual adjustment is repeatedly needed‚ suspect a deeper issue. Check the gear drive mechanism for wear or damage‚ as it directly impacts actuator function. Ensure the blend door isn’t physically binding or scraping against surrounding components; Addressing these underlying problems prevents recurring actuator issues and ensures a lasting repair.
Ignoring these factors leads to a cycle of temporary fixes and potential system damage.

Advanced Troubleshooting
Investigate ductwork for blockages‚ as noted in Dodge Ram forums‚ which can mimic actuator failure. Also‚ examine the gear drive for potential issues.
Checking for Blockages in Ductwork
Thoroughly inspect the ductwork associated with the blend door system‚ as obstructions can significantly impact airflow and temperature control. Reports from Dodge Ram Forum users highlight instances where debris‚ such as fallen objects from vents‚ jammed the blend door itself‚ creating the illusion of a faulty actuator.
Accessing the ductwork may require removing panels or components to gain a clear view. Use a flashlight to visually scan for any foreign objects‚ leaves‚ or accumulated dust that could be hindering the door’s movement.
Consider using an inspection tool‚ like a flexible camera‚ to reach difficult areas. Removing any identified blockages is crucial before proceeding with actuator adjustments or replacement‚ ensuring accurate diagnosis and effective repair.
Identifying Gear Drive Issues
Inspect the gear drive mechanism connecting the blend door actuator to the blend door itself. The Dodge Ram Forum discussions reveal cases where the actuator spins the gear‚ but the door remains stationary‚ indicating a problem within the drive.
Visually examine the gears for any signs of damage‚ such as stripped teeth or cracks. Manually attempt to rotate the gear with the actuator disconnected; any resistance or clicking sounds suggest internal issues.
Ensure proper engagement between the actuator and the gear. A loose or misaligned connection can prevent effective door control. If gear damage is confirmed‚ replacement of the entire gear drive assembly may be necessary for restoring proper HVAC function.

Resources and Further Information
Online forums like Reddit’s r/MechanicAdvice and Dodge Ram Forum offer valuable insights‚ while Technical Service Bulletins (TSBs) provide specific repair guidance.
Blue Star Brothers and R Y A/C Compressors offer detailed guides‚ and professional assistance is available for complex blend door actuator issues.
Online Forums and Communities
Engaging with online forums and automotive communities proves invaluable when tackling blend door actuator adjustments. Platforms like Reddit’s r/MechanicAdvice frequently host discussions where users share experiences and solutions regarding actuator positioning after replacement.
The Dodge Ram Forum‚ specifically‚ showcases real-world scenarios‚ including instances where obstructions within the ductwork mimic actuator failure‚ highlighting the importance of thorough inspection. These forums often contain detailed‚ user-generated guides and troubleshooting tips‚ offering alternative perspectives beyond official repair manuals.
Members often discuss the necessity of recalibration post-adjustment‚ emphasizing that simply aligning the actuator and door isn’t always sufficient. Searching these communities can reveal vehicle-specific nuances and common pitfalls to avoid during the manual adjustment process‚ saving time and potential frustration.
Technical Service Bulletins (TSBs)
Technical Service Bulletins (TSBs) represent a crucial resource for understanding blend door actuator issues and potential manual adjustment procedures. While not always directly addressing manual adjustment‚ TSBs often detail underlying problems that necessitate it‚ such as actuator failures linked to obstructions or calibration errors.
Manufacturers issue TSBs to inform technicians about recurring issues and recommended fixes. These bulletins may outline specific reset or recalibration procedures required after an actuator replacement‚ effectively guiding a manual adjustment process.
Accessing TSBs (often through paid subscription services or online databases) can reveal vehicle-specific instructions that supersede general repair guidelines. They can also highlight potential causes for actuator malfunction‚ preventing repeat issues after manual adjustment. Checking for relevant TSBs is a proactive step towards a lasting repair.
Professional Repair Assistance
Seeking professional repair assistance is highly recommended if you encounter difficulties during manual blend door actuator adjustment. Incorrect procedures can lead to actuator damage‚ lost index positions‚ or persistent temperature control issues. A qualified technician possesses specialized tools and diagnostic equipment for accurate assessment.
They can perform a comprehensive system check‚ identifying underlying problems like ductwork blockages – a common cause of actuator strain – that a manual adjustment alone won’t resolve. Technicians also have access to vehicle-specific reset and calibration procedures‚ ensuring optimal HVAC performance.
Furthermore‚ professional assistance can prevent unintended consequences‚ such as damaging the actuator or blend door itself. Don’t hesitate to consult a mechanic if you’re uncomfortable or unsure about any step of the process.